Latte Art Tulip - Step-by-Step Guide
Welcome to our simple and practical guide on how to pour a latte art tulip.
The difficulty level of pouring tulip latte art in your cup is intermediate.
If you are just starting out on your latte art learning journey, we recommend learning how to steam milk properly first. Getting the milk texture right is one of the most important things for latte art.
With a bit of practice, you’ll be able to learn the tulip in no time, but it might be a good idea to start out with the more basic latte art heart first.
But if you’re ready, let’s dive right into learning how to make a latte art tulip.
Latte Art Tulip Video Guide
The best way to learn the tulip latte art style is by watching the video. But, if you prefer to read, feel free scroll past the video :)
Video Links:
20% Coffee Discount Code: 'latteart'
In our Perth barista training courses, we primarily teach how to make great espresso, but we also touch on the fundamentals of latte art. Participants gain an understanding of how to set the crema and other fundamental latte art factors. If you prefer ‘learning by doing’ in a group setting, a barista class might be the right place for you to start.
Pouring tulip latte art in your cup is a lot of fun. There is nothing better than seeing the smile on someone’s face who’s been served an artistic cup of coffee.
So if you are ready for it, let’s jump right into our tulip latte art tutorial.
How to Pour Latte Art Tulip?
The tulip is very similar to pouring a heart, except that you push a number of bulbs into the cup. So if you think back to your heart pouring, you set the crema, and then move the jug close to the crema to push a white bulb into the cup. A tulip follows a similar method, except you pour many bulbs into the cup.
1. Set the Crema

Set the crema as usual. Pour from a slight height to make sure your pierce the crema, and the foam holds it in place. If you see any white on your crema, pour over the top of it from a height to push it below the surface.
2. Push the First Bulb Into Your Cup

From here, stop pouring, and move your jug close to that nice brown crema surface. Start your milk flow again as you “push” your first white bulb into the middle of the cup.
3. Push the Second Bulb Into Previous Bulb

Once you have formed that bulb, stop your pouring stream, move back to the start of the cup, and repeat the process. When you pour your second bulb in, make sure you pour it into the centre of the previous bulb in order to maximise your symmetry.
4. Keep the Bulbs Going

Repeat this process with four or five bulbs, for the first few, push them into the previous bulb, and then as the cup fills, work your way to the top of the cup, pushing bulbs less and less each time.
5. Finish the Pattern

As the cup fills, push in one last bulb, lift up your jug and pull through the centre of all the bulbs, to cut through your pattern.
Tulip Latte Art Tips
As you get better, you can stack more and more bulbs into the pattern - just remember that sometimes it’s better to be simple and clean than it is to make a pattern over-complicated and messy.
Remember! Aim to the centre of the previous bulbs.. if you push the bulb into the side of the previous bulb you’ll lose out on symmetry. The first and second bulbs are the most important and then it will be natural to continue to stack cleaning after that.
Milk Texture, Milk Type & Temperature
Your milk texture is again very important for the tulip. You can however pour a tulip with milk that is quite frothy, so if you're pouring a cappuccino you can still try this pour, just with less bulbs.
Full cream milk with higher fat content will always make latte art easier. Skim milk tends to separate, and when you're pouring the bulb style pours like the latte art tulip or latte art heart, this will lead to a big blob of froth falling into the cup.
This froth separation can also be caused by heating your milk too hot. If you're new to texturing milk, I'd recommend grabbing a milk thermometer to make sure your milk is no hotter than 65°C.
Ingredients & Equipment
If you've read a few of my blog posts now.. you know what I'm going to say here. THE COFFEE YOU USE MATTERS!
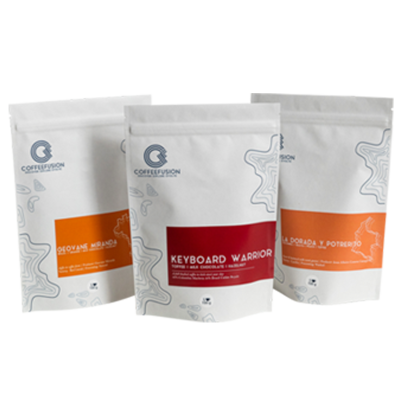
Quality Coffee – I use freshly roasted Keyboard Warrior for all of my latte art tutorials. When using coffee, make sure it is at least 7 days after roast, but no longer than a month after roasting. This means that the cheap coffee in the super market is already stale, and won't help you pour pretty patterns. Use the discount code 'latteart' for a cheeky 20% off your next coffee order!
Best Milk Jug – A jug with a nice rounded spout will help you pour nice tulips. It is also super important that the spout is aligned. I like the barista hustle milk jugs because they are manufactured carefully to make sure they're aligned.
Look at the milk jug you're using. If it has a rounded spout and the handle is aligned with the spout, you don't need to buy a more expensive one. But if it isn't, a good jug is a worthwhile investment. Baristas always bring their favourite jug to latte art competitions because they're used to pouring with it.
Coffee Machine – I've had my Rocket Giotto Evolution for 10 years and it still steams great milk and makes great shots of espresso. In the videos above I used the La Marzocco Linea Mini, which is another very high end dual boiler machine. If you'd like some advice for purchasing a coffee machine that fits in with your budget, feel free to email me via the contact us page, or reach out via instagram.
Keep Frothin'!
We hope you enjoyed this tulip latte art tutorial. Once you feel comfortable with this latte art pattern, we recommend moving on to learn how to make a latte art rosetta and the more advanced latte art swan.
Remember if you pour some latte art you’re proud of you can send it on my instagram @thecoffeefusion - and I’ll give you some feedback if you still need it, but until next time…
Keep Frothin’


Leave a comment
Please note, comments must be approved before they are published