Latte Art - All You Need to Know
Welcome to our Beginner's Latte Art Blog. This post aims to be your one-stop-shop for everything you need to know about latte art.
What is Latte Art?
But first – what is latte art? A simple question with a rabbit-hole of an answer. Latte Art, or coffee art, is the act of pouring steamed milk into espresso with the aim to create a coffee art design in the cup. This can be as simple as a Latte Art Heart, or as advanced as something like Latte Art Swan. It includes Free Pour Latte Art, and etching. For the most advanced coffee art, baristas come up with their own signature latte art designs.
If this all sounds a little bit bamboozling – don't worry. By the end of this blog you'll be well on your way to pouring some beautiful coffees. So grab your coffee, and lets get pouring latte art!
➜ You might also be interested in our guide about Types of Coffee
How to Do Latte Art?
When I was a beginner barista, I always wanted to know how to do latte art. I would watch other baristas make latte art on their coffees, and try to mimic their milk jug movements (with very inconsistent results!). Eventually I got frustrated, and asked the head barista at the cafe “How do you do latte art?!” They smiled – I'm sure they had been in the same position as me years earlier. They taught me some beginner latte art steps. How to set the crema. How to get a clean canvas. The importance of great espresso and well textured milk for our coffee art. Without these beginner latte art tips, I've seen baristas who have made coffee professionally for years struggle with consistent latte art.
Here they are.
Latte Art Tutorial [Step by Step Video Guide]
As latte art is a visual medium. I think a video latte art tutorial is probably the easiest way to understand. I created this latte art tutorial video specifically for this blog post. Have a quick watch, and we will break down the tutorial further afterwards.
Hopefully these latte art tips and tricks in the video above have given you a basic understanding of how to pour. Now we are going to break things down further, to help you understand how to pour latte art even better.
How to Pour Latte Art – Steps Explained
Pouring Latte Art always has a few simple steps, along with a few individual latte art techniques for the different patterns. When I'm pouring latte art – these are the steps I go through.
- Extract Great Espresso and steam my milk carefully. If you don't start with great espresso, your coffee could look as pretty as anything, but the taste isn't there. It's also important to have freshly roasted coffee so that you have an espresso shot with nice crema for your pour. The same is true with milk steaming. If your milk doesn't have that silky wet paint look, if it's too frothy or too thin, it won't pour latte art. I'd recommend starting with full cream milk which makes pouring latte art much easier!
- Set the crema. You do this by pouring from a slight height to allow the frothy milk to pierce the crema. In every latte art tutorial, I make a note to remind people how important this is. We want a nice brown canvas that we can pour our latte art on to. In latte art terms, this clearly defined pattern on a brown canvas is known as contrast.
- Move in and pour your pattern. Study the latte art tutorial for the specific pattern you want to pour, and learn the latte art techniques for your chosen design. For example, hearts require a big bulb style pour, rosettas require a wiggling motion, and more difficult latte art pouring uses a mix of different latte art techniques. When you're actually pouring, make sure you pour carefully to create nice symmetry in the pattern. It's also important to pour into the centre of the cup, so your pattern has nice positioning. In latte art, we call this harmony.
- Lift up and pull through to complete your design. This is the final technique that most beginners don't understand. If you don't lift up before you pull through, you will drag your whole pattern and the end design will look messy. You can ruin the Symmetry and Harmony if your pattern just by failing to lift up your jug on the pull through.
Best Latte Art Equipment & Ingredients
Coffee Machine
On my YouTube channel, I get so many people asking me 'What is the best coffee machine for Latte Art?' or more importantly 'What is the best HOME espresso machine for latte art?'. Most commercial machines will have the steam pressure to extract great espresso and steam quality milk assuming that they have been well maintained. For your home espresso machine, you need to be willing to invest a bit to get something decent. I personally own the Rocket Giotto Evoluzione for @home use and I'm very satisfied with it.

If you want to pour consistently clean latte art, I'd stay clear of any of the appliance brands (Breville/Sunbeam/Krups) under the $500 mark. Most of these machines have a milk frother connection that adds too much air to the milk. Once you start spending $500+, you start to get machines with the capability of creating the milk and espresso you need. Of course – you can start spending big money quickly when it comes to coffee machines. If your budget is $1000+, get in touch with me to discuss some options. Remember to spend at least 25% of your budget on a quality grinder when you're buying a high end machine.
Coffee
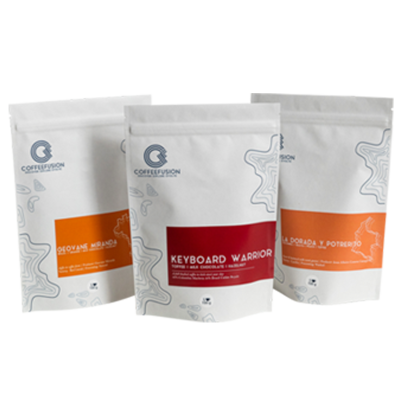
The best coffee for latte art is also a question people have to ask. My blend Keyboard Warrior is great for latte art, not only do the coffees in the blend provide a great crema for pouring, but the coffee tastes great with milk.

All my latte art videos and pours found in my content use Keyboard Warrior. You can try it out for Free as part of my Sample Pack when you join the Coffeefusion Subscription.
Milk Frother
If you're on a budget, there are some alternate ways to get silky textured milk. The Best Milk Frother for Latte Art I've seen by far is the nanofoamer. This is a handheld milk frother for latte art which is kind of like an electric whisk.

Most of the other electric milk frothers don't seem to create the microfoam needed for latte art. There are also non machine options like the Bellman stovetop Milk Steamer which could be cheap milk frothing option.
Milk
It goes without saying that your milk is very important. The best milk brand for latte art is whichever one is available to you with high fat content. I like Bannister Downs and Brownes extra creamy as the main two milks I'll use. Most big milk brands have a premium label milk which is probably the best option for latte art.

With the rise in popularity of alternate milks, I am also getting a lot of questions about the best soy milk, almond milk, coconut milk, oat milk etc etc for latte art. The main problem with most alternate milks is that they react with the espresso. For this reason, latte art will always be harder with these alternate milks compared to dairy milk. If you want to make latte art with almond milk or any other milk, definitely look for a brand which is made specifically for cafe/coffee use.
For example Almond Breeze have a normal version which is TERRIBLE with coffee. The cafe version though works quite well. For my money though, the best alternate milk for latte art is oat milk. I like Minor Figures, which textures well, has a great mouth feel in the cup and pours good latte art.
Best Milk Jug for Latte Art
The best milk jug (also referred to as milk pitcher) for latte art can be a very personal thing. When baristas go to latte art competitions, most of them bring their own milk jug. Personally my favourite milk jug for latte art is one with a nice rounded spout like the Barista Hustle Jugs I sell.

The best size milk jug for latte art for me is around 400mL for home use, and 600mL if you're making multiple coffees at a time in a cafe. You can also get a few different jugs with different spouts to pour different designs. Although quite expensive, the Jibbi Jugs come in a range of spout shapes to help your different pours.
If you're looking for a milk jug, make sure the handle and the spout are aligned – this is one of the problems with cheap jugs. Second to this, make sure the spout has a nice lip on it. Sometimes companies who advertise 'latte art pouring jug' on their products have never poured a pattern in their life, and wouldn't know if the milk jug can actually pour latte art.
Other Important Latte Art Considerations
Best Milk Temperature
Believe it or not, your steam milk temperature for latte art is quite important. Back in the 90s/00s, cafes had a lot of complaints that the coffee 'was not hot enough' – especially with the older population who were used to drinking coffee with boiling water from a kettle. Most baristas keep their milk temperature between 60-65°C for latte art. Any milk temperature hotter than 70°C tends to cause the frothy milk to separate out, and then latte art is impossible. At this milk temperature, your latte art will end up as one big frothy blob on top of your coffee.
60-65°C is a point where you can pour good latte art, and the sweetness of the milk is still there, and the customer can still enjoy it over 5-10 minutes. Having a good milk thermometer.
Frothing & Texturing the Milk
Now that you've got all of the gear and ingredients you need. Lets learn how to texture milk for latte art properly. The perfect steamed milk for latte art requires too things: A Whirlpool and Air. To texture milk for latte art with a steam wand, place the steam wand just off the centre of your milk jug. Start with your steam wand steam tip just below the surface, and turn your wand on full. You'll see the whirlpool appear in your milk – now drop your jug down to add some air in to your milk. Make sure you don't add too much air, or your foam will be too thick for latte art. I use a guide of 1cm froth per coffee for the perfect steamed milk for latte art.
You can make latte art with a milk frother, as long as you can get a similar milk texture as the technique above. As mentioned earlier, the nanofoamer is the only cheap milk frother I've used that has a similar result.
Of course – it will take some practise to get consistently good results. A lot of new baristas ask how to practice latte art without wasting milk. Whilst the best way is just to make lots of coffees, you can practice steaming your milk by adding a drop of dishsoap to water in your milk jug and steam that. The result looks quite a lot like textured milk... just don't drink it!
If you want some more milk texturing tips – check out this blog post specifically on milk texturing.
Latte Art Designs
Finally – here is the Latte Art Design List. I'm going to mention the basics here, but a lot of baristas end up coming up with their own signature latte art designs. For now, focus on pouring these four patterns. Once you can consistently pour these latte art designs, you've graduated and ready to design your own fancy latte art!
Heart Latte Art
Difficulty level: Beginner
Secret Tip: Get the pour in the middle of the cup for the best effect. Lift up before you pull through.

➜ Check out our in-depth Latte Art Heart Tutorial
Tulip Latte Art
Difficulty level: Intermediate
Secret Tip: For the best symmetry, make sure you push your bulbs into the middle of the previous bulb.

If you can pour a heart, you are only a bit of practice away from being able to pour the tulip latte art. After all, the tulip latte art is much like the bulb style pour of the heart, with a lot more bulbs in the cup linked together.
➜ Check out our in-depth Latte Art Tulip Tutorial
Rosetta Latte Art
Difficulty level: Intermediate
Secret Tip: Practice rocking your jug side to side with some water in your jug, making sure your movements are consistent. This will lead to better symmetry in the cup.

The Rosetta Latte Art is arguably the most iconic latte art. It takes the shape of a leaf, and is a right of passage for all baristas. When you can consistently nail this one, you know you've got some latte art game.
➜ Check out our in-depth Latte Art Rosetta Tutorial
Swan Latte Art
Difficulty level: Advanced
Secret Tip: Practice the individual components first by nailing your Heart, Tulip and Rosetta Patterns. When pouring your Swan, make sure you pour slightly slower so you have time to get all the elements into the cup.

➜ Check out our in-depth Latte Art Swan Tutorial
Other Designs You Can Do with Latte Art
Once you can pour these fundamental patterns, there's lots of fun latte art you can create. The best latte artists can basically turn any idea they have into a pattern in the cup. It's really amazing to see holiday latte art like halloween latte art, pictures of cat latte art made by freepouring only – Instagram is a great place to see these pours.
Most signature latte art pours combine freepour latte art with a little bit of latte art etching. Etching is when you use a tool like the end of the thermometer to draw on the surface of the coffee. Some latte art competitions are 'Freepour Only”, where etching is not allowed. However others allow you to incorporate some etching as long as it is not the main aspect of the design.
Latte Art Courses
At the moment, we cover the basic ideas of latte art in our Barista 101 course. While most of the course is centred around understanding great espresso and milk, time is spent teaching you how to set the crema when we are pouring the milk coffees. From here I give demonstrations on the concept of latte art for people to practice later.
As I'm planning to expand on our barista training, in the future I will run a barista latte art course – but there will be a requirement to have either been making coffee for a solid amount of time before hand, or having run through my Barista 101 course first. This is so that I know you have a strong understanding of how to make coffee, so we can focus on pouring latte art during the course.
Latte Art Competitions
There are a few different types of latte art competitions. The first one is a more informal latte art smack down, which is usually a local event held at a cafe or coffee company. In this competition there is a usually knock out format, where baristas go up against each other, and a team of judges vote on which latte art they think is the best.
There is a set voting structure for how to consider how good latte art is, including difficulty of pattern, contrast, harmony in the cup, uniqueness and overall visual appeal. Competitors get knocked out or advance through the stages until there is one winner. There are quite often rounds within these smackdowns where you might be required to pour into a specific cup, pour a specific pattern, or pour with a chosen alternate milk. These latte art competitions can usually have pretty decent prizes if you manage to win.

The more recognised international competition is the World Latte Art Championship. This Competition usually runs at a state level first, then national level, and the national winner wins the right to compete in the world comp. This Competition is for seasoned baristas who are very talented latte artists, but if you're interested you can usually go and spectate these competitions and see their talents. You might end up on the world stage one day, in which case I hope you remember this blog!
Closing Words
Like any skill, latte art is something that takes a short time to learn and a life time to master. In my time pouring I have competed in a number of local smackdowns, came third at state level, and I have one of the biggest latte art knowledge bases on my website and on YouTube. There are still days however that I don't get my milk right and my pour doesn't look great.
But when I really want to pour something nice, and focus on the steps involved in the latte art design, I can consistently pour nice versions of patterns. Take this advice, and check out the blog posts for the individual patterns, and practice them one at a time until you master them. Before too long you'll go from beginner to barista.
Keep Frothin'
Gary


Leave a comment
Please note, comments must be approved before they are published